
API’s are a fundamental part of AWS, all actions are handled through API calls whether you call them on the AWS Management Console or CLI. This is why it’s a good idea to get familiar with APIs in the first place and know how to create them.
AWS recommends using an API for most of your tasks because it would be easier later to scale your cloud infrastructure. In this example, we will create a simple API that calls a Lambda function.
I recommend starting with a simple blueprint, in this way all the necessary resources will be created automatically and linked together. Later you can modify these settings.
Starting with a blueprint
Let’s start with the AWS Management Console. Select Lambda from the services and click on Create function.

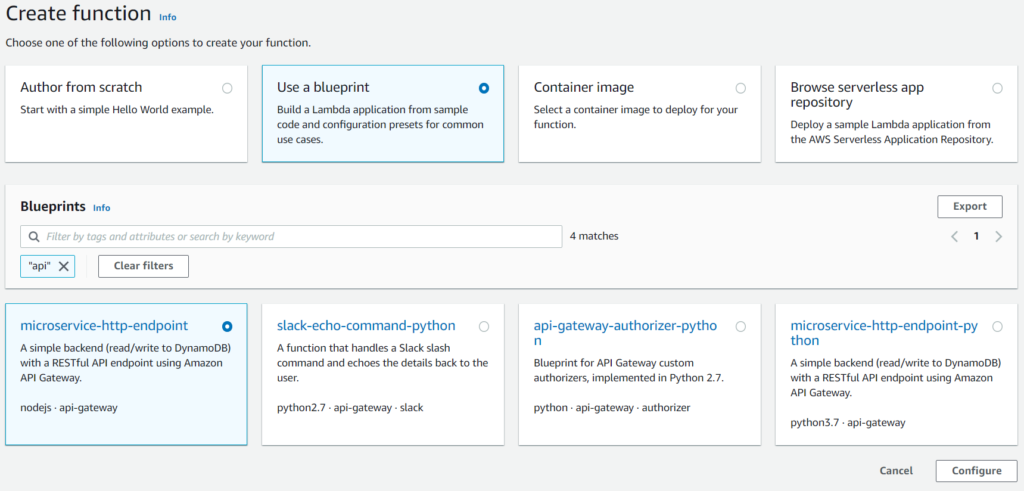
Under Create function select Use a blueprint and filter for the word “api” under Blueprints. Select the microservice-http-endpoint blueprint and click Configure.
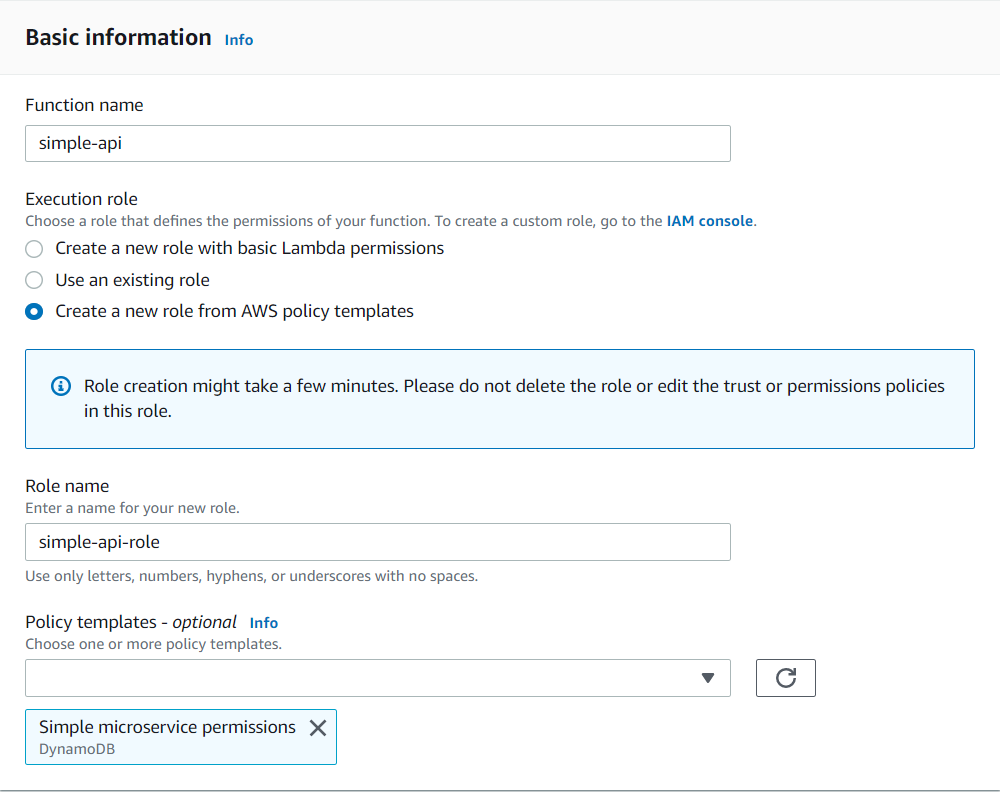
On the next screen, we configure the Lambda and API Gateway. Name your Function under Function name and set a role name under Role name. Under the API Gateway trigger select Create an API and select REST API as the API type. AWS recommends using the HTTP API because of its performance, but currently, the REST API has more features. You can see a full comparison between HTTP and REST API on this page: https://docs.aws.amazon.com/apigateway/latest/developerguide/http-api-vs-rest.html
For security reasons, we select API key under Security. At a later stage, we will change this to Cognito but for now, API keys are the way to go because they are really easy to manage and provide basic security.

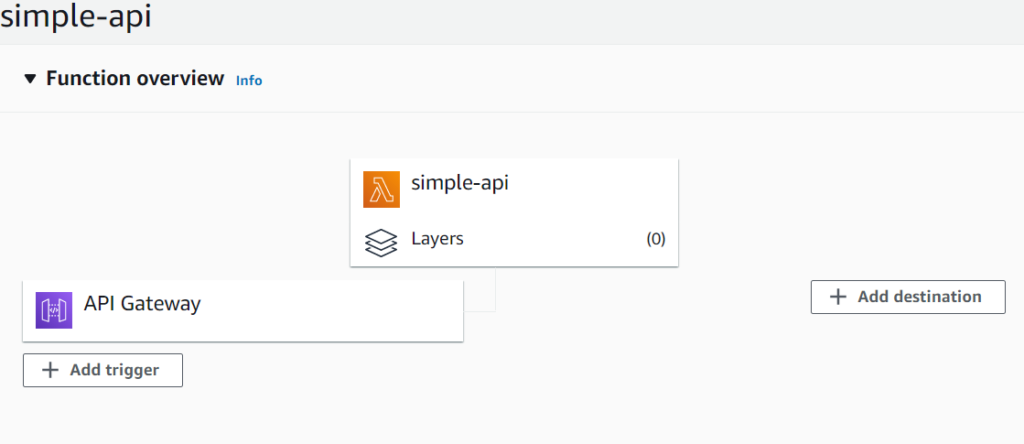
The Lambda and the API Gateway are now created and linked together. Great job! 🎈
Configuring the API Gateway
Let’s start configuring the API Gateway first. Select API Gateway from the services in the AWS Management Console and select the newly created API. The API is now active and open: it will accept any connection and won’t require an API key. Since we don’t need it first we delete the GET method under our sample API.
Let’s create a resource called “hello”. Select your API root (in our case simple-api) and under Actions select Create Resource. Name your resource “hello”.
Under this resource we then create a GET method. Be sure to check “Use Lambda Proxy Integration” because that is how we will read the resource name from Lambda. Also, select the Lambda Function that has been created by the blueprint automatically.

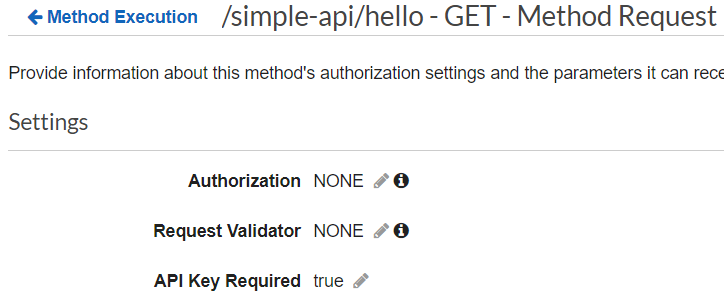
Now let’s apply some security to our API. 🔒 Select our newly created GET method and click on Method Request. Here we change API Key Required to true.
We are almost done with our API Gateway configuration! 🤸 But here comes the most important part. We should deploy our API. Under Action select Deploy API.
Before leaving our API service we should write down some important information: our Invoke URL and API key. Under Stages select your default stage, where you can find the invoke URL. Under API Keys you find the simple-api-Key which is your API key. Now we can go back to Lambda. 💾
Configuring Lambda
The blueprint created a Dynamo DB example. We won’t use Dynamo DB for now. Replace the default code with this one. And click Deploy. Now we can test our API!
const AWS = require('aws-sdk');

exports.handler = async (event, context) => {

    var response_status, response_body;

    if (event.resource.endsWith('hello')) {
        response_status = 200;
        response_body = "Hello from Lambda";
    }
    else {
        response_status = 200;
        response_body = "Unsupported resource";
    }

    const response = {
        statusCode: response_status,
        body: JSON.stringify(response_body),
    };
    return response;
};
The best tool to test APIs is Postman. You can create an account for free.
In postman test your newly baked API. Be sure to set your API key. 😀

Well done! You now have a fully working API with basic security. 🥳🎉