Starting May 1, 2024, your Amazon Lightsail prices are likely to increase. This is if you are using IPv4 addresses. The current prices can only be maintained if you switch to the new IPv6 instance bundles. But what if I told you that you can get an extra vCPU for free if you are an old Lightsail customer? Sounds good? 😎 Either way, the transition is not a click away. Read on to learn how to safely upgrade your Lightsail instance.

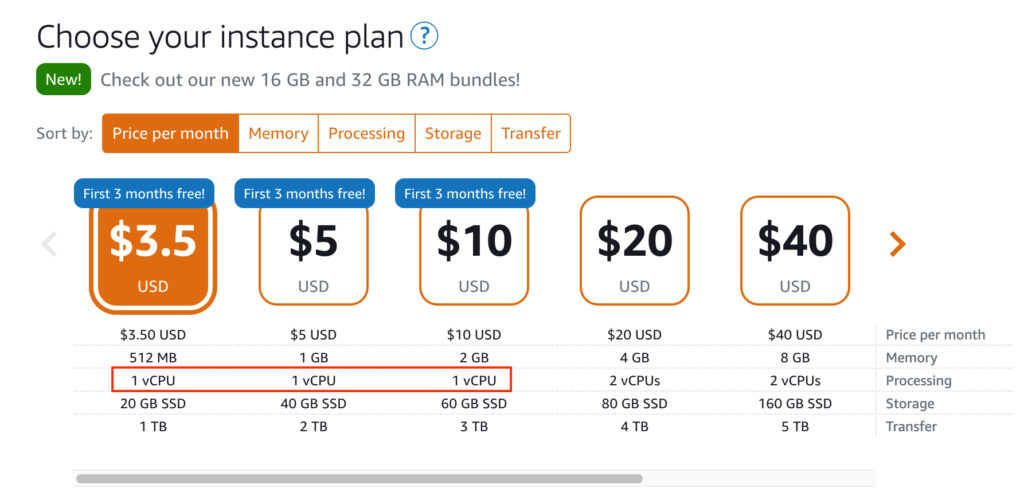
One of the biggest disadvantages of Lightsail over EC2 is that you cannot easily change your instance type. Currently, there is no one-click option to switch from a 512 MB memory bundle to a 1 GB memory bundle. AWS is aware of this issue and is working on a solution that will allow you to upgrade to a larger bundle in the future. Until then, we have to do it the hard way. 💪
How do I get 1 vCPU for free?
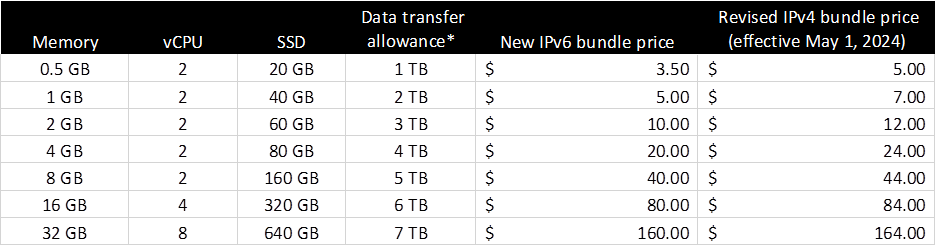
Previously, the cheaper Lightsail bundles only offered 1 vCPU. This was because the underlying t2 instances had 1 vCPU options. Now that AWS Lightsail has moved to the new t3 instance family, there are no 1 vCPU options, only 2 vCPU’s. While there has been a change under the hood, AWS has maintained its Lightsail pricing, so you get an additional free vCPU when you move to the t3 instance family.
Upgrading a Lightsail instance
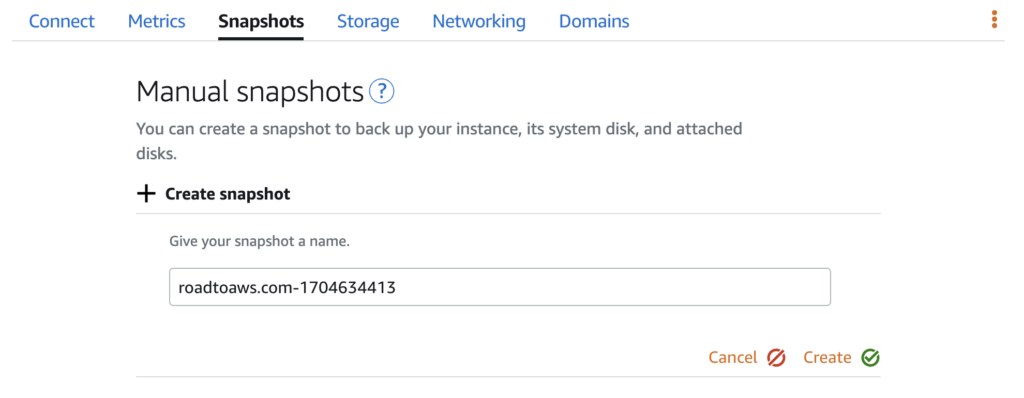
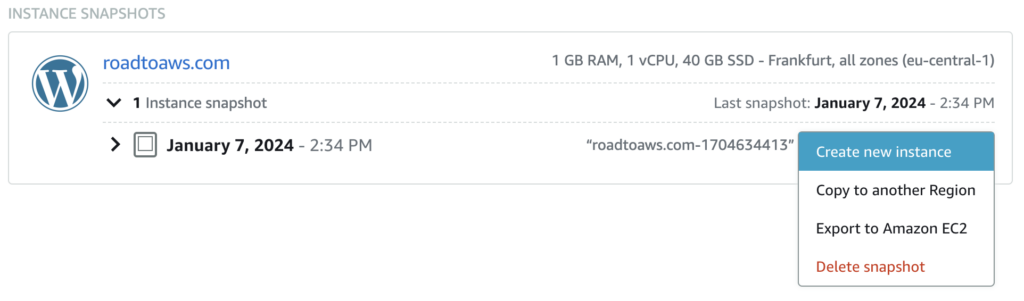
To upgrade your Lightsail instance, you must create a manual snapshot. Under Snapshots, click Create Snapshot and give your snapshot a name. Creating a snapshot takes time, so be patient while your snapshot is being created.
While the snapshot is being created, go to the Networking tab, and if you have an IPv4 address, be sure to click Create static IP. This will allow you to keep your current public IPv4 address. Unfortunately, there is no option to keep your IPv6 address, so you will need to update your DNS settings in the future.

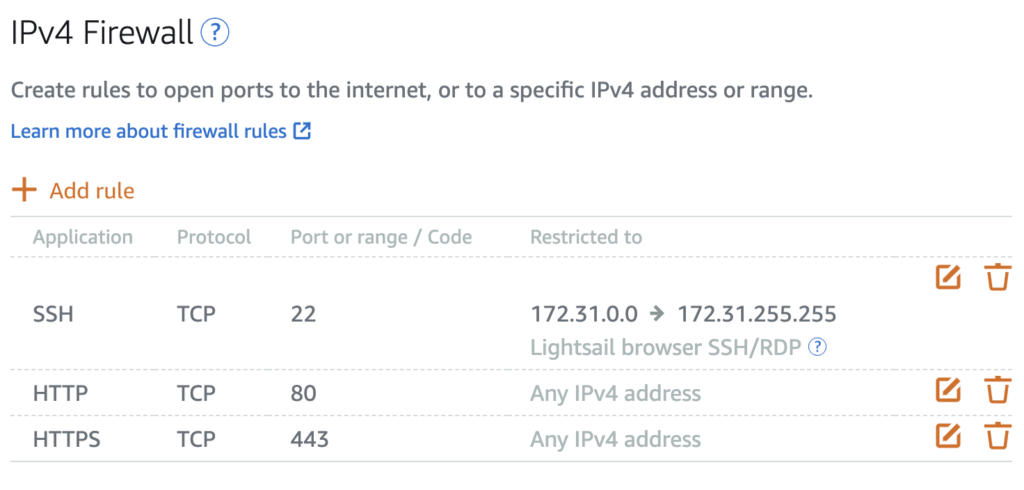
Under IPv4 firewall, make a note or a screenshot of your firewall rules, as they won’t be migrated either. If you have IPv6 networking, do the same for these rules as well, since you may have different IPv4 and IPv6 firewall rules.
By now, your snapshot has probably been created. Select Snapshots from the left menu and you will see your newly created snapshot. Click on the three dots and select Create New Instance. Here you can select an IPv6 bundle if you don’t need a public IPv4 address or the new 2vCPU options. There is only one restriction. You cannot select a lower bundle that you already have.
💡 Note that Lightsail instance names are unique, so you cannot name your new instance the same as your previous instance (and there is no option to change the instance name in the future). I added www. in front of my instance.
Now that your new instance is up and running, first detach your IPv4 address from your old instance and attach it to your new. Also, enter your firewall rules that you saved earlier.
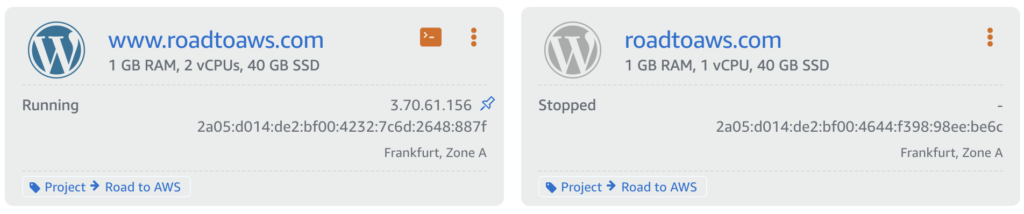
Do not forget to update your DNS settings with your new IPv6 public address. Stop your old instance and test your new instance. 🧪
Cleanup
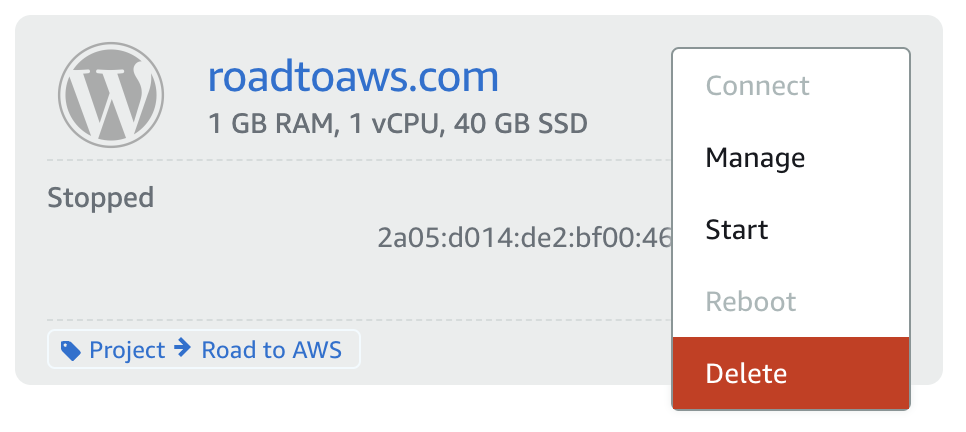
Once you have verified that the new instance is fully functional, you can perform a manual cleanup. First, go to Snapshots and delete the snapshot you created for the upgrade. AWS charges $0.05 USD GB/mo for snapshots, so if you don’t need it, just delete it. You will also need to manually delete the old instance.
Amazon Lightsail is the easiest way to get started with AWS, upgrading your instance is not. While AWS implements this feature, you must manually upgrade your Lightsail instance.