
During the API Gateway series, we already created an API Gateway and a new Lambda function. We named that function simple-api-auth for reason. Can you guess why? 🤔
Cognito User Pools
Amazon Cognito is a simple and Secure User Sign-Up, Sign-In, and Access Control tool. It can manage User Pools and Identity Pools. User pools are user directories that provide sign-up and sign-in options for your app users. Identity pools provide AWS credentials to grant your users access to other AWS services.
For our API Gateway, we will create a Cognito User Pool that will handle all of our authorization tasks, including managing usernames, passwords, and access tokens.
Let’s start with Cognito and selecting Manage User Pools. Here we Create a user pool. We name our pool simple-api-AUTH and review the Step through settings as we customize our pool. ❗Remember that we cannot change these attributes after we have created the pool. Policies and other pool settings can be changed later but attributes cannot. When we are at the “App client” settings we create a new app client for our API Gateway.
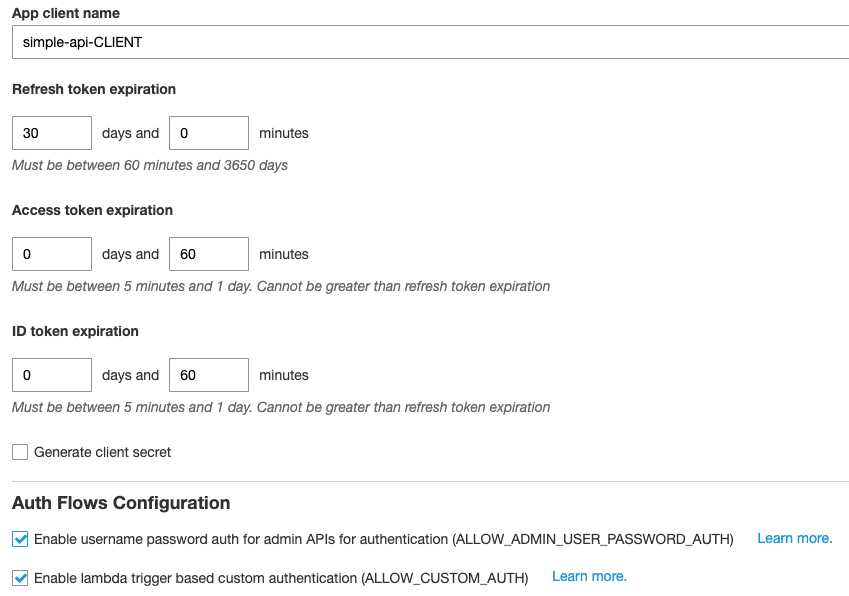
Here we set up our App client. For simplicity, we will uncheck the Generate client secret option and enable the ALLOW_ADMIN_USER_PASSWORD_AUTH that we will need for our Lambda function to access.
Our User Pool is now ready. It’s that easy. 😀
Adding a user to a Cognito User Pool
We have several options to create users in our user pool. The default settings allow users to sign themselves up. We can create a simple UI or enable other identity providers like Facebook or “Sign in with Apple”. For simplicity, we will create the user manually under Users and groups.

After we have created the user the user will receive an Email with the following information:
Your username is misi and temporary password is 00eEhtI;.
It looks like everything is ready in Cognito but if we look closely we see that the user is not yet activated. The account status is: FORCE_CHANGE_PASSWORD 😡
We cannot change this in the Cognito UI so we will do this in Lambda instead.

Connecting our API Gateway to Cognito
We now head back to our API Gateway and select Authorizers. Here we Create New Authorizer.
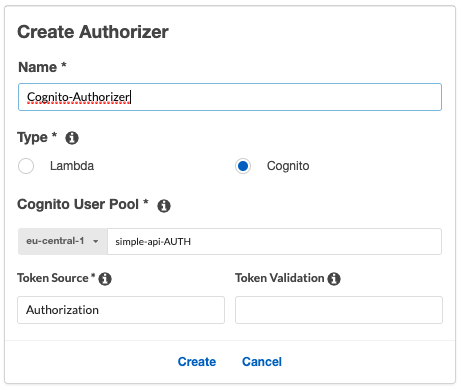
We select the type to be Cognito and select our Cognito User Pool that we have created earlier. You can name your token source whatever you like but for following standards, we name it Authorization.
Securing an API method with Cognito
Let’s start securing our methods with Cognito authorization. I will select the GET method inside the hello resource that we have created earlier. We have set up API Keys before for this method so I will remove the API Key required option and select Cognito for our Authorization.
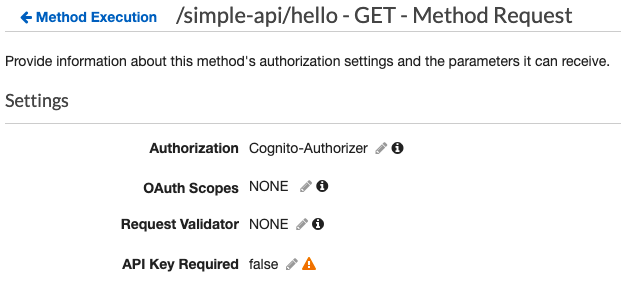
If we check out our method we now see that Cognito is the Authorizer.

Preparing our auth function for authentication
When we added a new Lambda function to our API Gateway we have created an auth method for our gateway. We will use this for authentication. It’s a good idea to rely on the features that Amazon API Gateway already has, including request validations. The API Gateway can validate the query string, the headers, and the body. The latter we will discuss in a later post because it requires creating a model. Setting up query string parameters is much more simple.
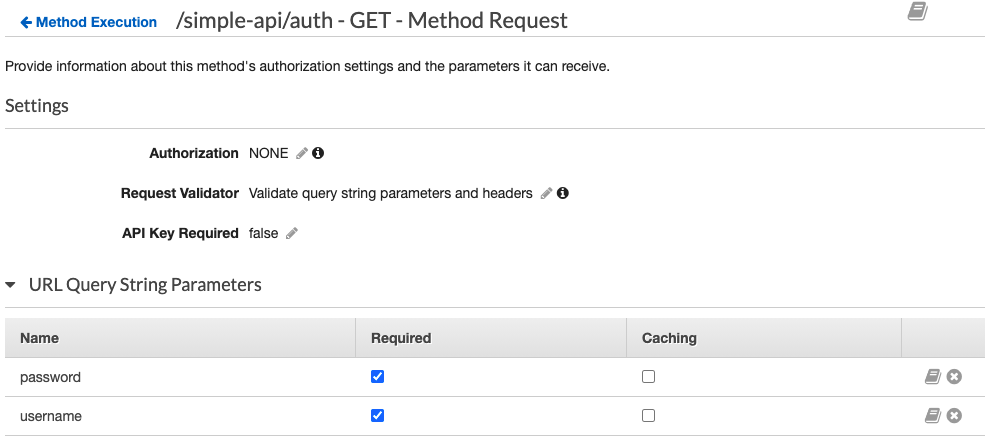
Let’s supply username and password as URL Query String Parameters and mark them Required. Under the Request Validator select Validate query string parameters and headers.
The AWS API Gateway will now check for these parameters and if they don’t exist the gateway will throw an error to the user.
Don’t forget to Deploy the API.
Setting up the necessary permission for Lambda
Our Lambda function needs to access our Cognito user pool. Yes, you guessed right we are going to IAM. ✨
There is no default policy for the permissions we would like to issue so we will create a new policy for it. We need AdminInitiateAuth and AdminSetUserPassword permissions for our Lambda function to manage our Cognito user pool.
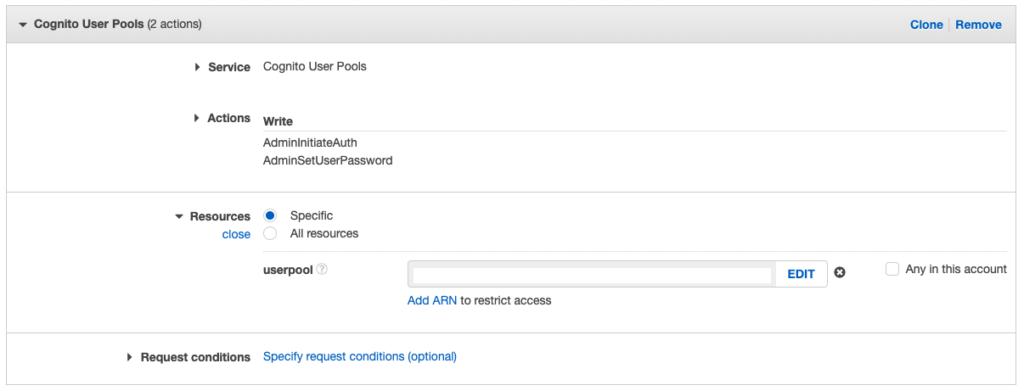
Under Policies we “Create policy” and at services, we select Cognito User Pools. Under Action we select the two permissions and under Resources we add the ARN of the Cognito User Pool.
We then create this policy and attach it to our simple-api-Role as we learned in the previous post.
Confirming the user
Let’s go back to Lambda and get rid of that pesky “FORCE_CHANGE_PASSWORD” status. For this, we will write a simple Lambda function that will change the password of our user.
This is the code I used to verify the user:
const params = {
    Password: 'password',
    UserPoolId: 'Pool Id',
    Username: 'username',
    Permanent: true
};

await cognito.adminSetUserPassword(params).promise();
Run the code and if we set up everything correctly Cognito will show that the account status is now CONFIRMED.
Final touches
We are almost finished! We just have to write a small code that will call Cognito for authorization. Luckily we already have a sample Lambda function that we can modify: simple-api-auth
Replace the code we had earlier with this sample code:
const aws = require('aws-sdk');
const cognito = new aws.CognitoIdentityServiceProvider();

exports.handler = async (event) => {
    const params = {
        AuthFlow: 'ADMIN_NO_SRP_AUTH',
        ClientId: 'App client id',
        UserPoolId: 'Pool Id',
        AuthParameters: {
            USERNAME: event.queryStringParameters.username,
            PASSWORD: event.queryStringParameters.password
        }
    };

    var authResponse = await cognito.adminInitiateAuth(params).promise();

    const response = {
        statusCode: 200,
        body: JSON.stringify(authResponse),
    };
    return response;
};
Deploy and we are done!
Testing our API Gateway authentication
Let’s go to Postman and see if everything is working as expected.
If we call our /hello method we will receive the following error:
“message”: “Unauthorized”
Great! We need an IdToken to access this method. Let’s call our auth method to get the token. API Gateway will check if we have the username and password params. If not, we will receive an error.
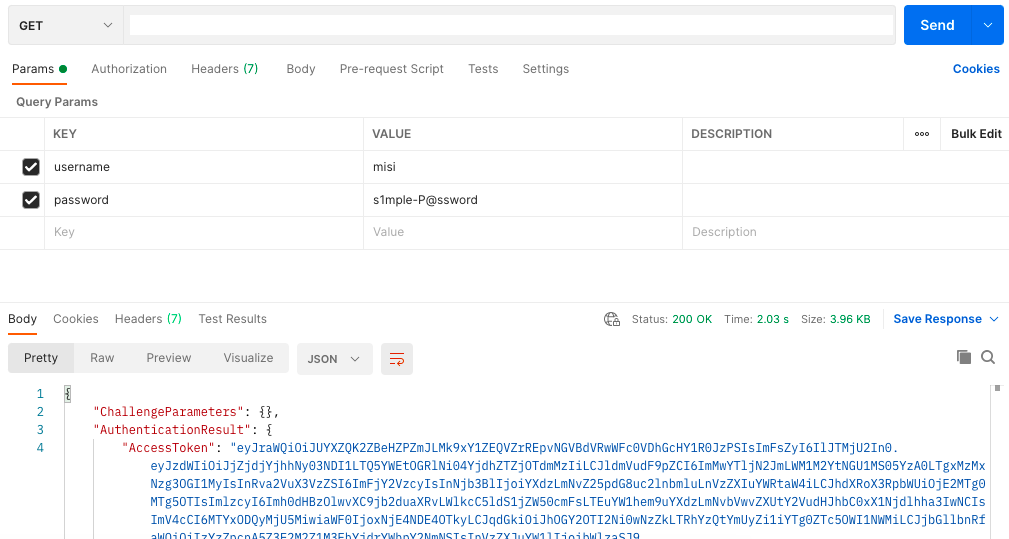
We received our token. 🥳 Now if we go back to our /hello method and set the Authorization header we will have access to our function. Be sure to use the IdToken for Authorization.
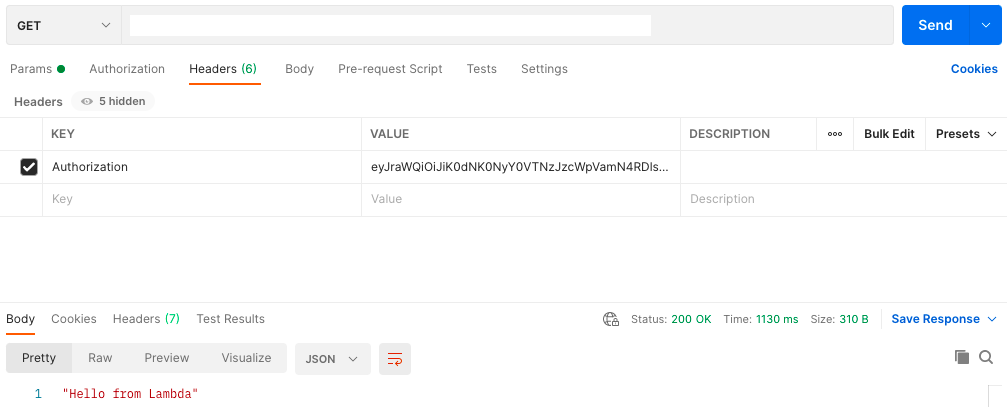
And voila! Our API Gateway is now using Cognito for authentication.